Showing posts with label recipe. Show all posts

Tuesday, June 26, 2012

Happy 4 Pudding

Two years ago I discovered that my birthday (June 26th) coincides with National Chocolate Pudding Day.  And so, for the past 2 years, I've tried my hand at vegan chocolate pudding; and for the past 2 years, I've not been a big fan of my attempts.  The raw pudding with avocado wasn't bad, but it was a bit odd and something I've had no desire to try again.  The low-fat pudding with tofu last year was healthy, but it lacked the dark chocolate punch I enjoy.

To be honest, after sampling last year's offering 364 days ago, I've not had any desire to try a new chocolate pudding.  This year's birthday chocolate pudding, however, is changing my mind about chocolate pudding as a dessert of choice.  It is a dessert I'd make again and serve to friends.  It is simple (the hardest part was getting the peanut butter off the spoon and into the pot)!  It takes about 4 minutes to make, has only 4 ingredients, easily serves 4, and rates 4 (out of 5) on the yummy scale.  And it's vegan!

Through the year I collect chocolate pudding recipes for this birthday tradition.  And for this year, the 4 Ingredient Vegan Chocolate Peanut Butter Pudding posted by Food Doodles stood out.  I have come to love chocolate and peanut butter, and most important, I had all the ingredients I needed -- sort of. 

Knowing my taste pallet and being limited by my pantry, I adapted the recipe by using bittersweet chocolate chips (60% cacao) and soy milk, rather than semi-sweet chips and almond milk.  The recipe is flexible enough so that you could use almost any chocolate chip or nut milk you enjoy or have on hand.  In terms of the nut milk, while soy worked well as a substitute for almond, I don't know if coconut milk would work as it tends to be more watery and not as creamy as soy or almond.  If you try coconut, let me know how it turns out.  (And for you non-vegans, I have a feeling that cow milk would work too.)

First, I poured 1 1/3 cups of soy milk into a medium sauce pan and added 5 tablespoons of creamy peanut butter.  On low heat, I melted the peanut butter, whisking it smooth, then added 1 cup of bittersweet chocolate chips and 2 teaspoons of pure vanilla extract.  I stirred continuously until the chips were melted, then removed from heat and whisked the chocolatey mixture until smooth.

The aroma of the dark chocolate was very pronounced and I couldn't wait until I finished ladeling the mixture into four 5-oz. ramekins so that I could licked the pot clean (which of course I did!)  The taste matched the smell as the warm pudding has a wonderful dark chocolate bite which is rounded out by the subtle taste of peanut butter. I was curious to see if the cooled "finished" pudding would have the same richness.  I would need to wait 1-2 hours to see as I covered the ramekins and placed them in the fridge to cool.

Though chocolate and peanut butter may cause you to think, "Reese's Peanut Butter Cup", this Chocolate Peanut Butter pudding elevates that classic to a new adult dessert level.  The bittersweet chocolate and unsalted natural peanut butter I used create a mature chocolatey bite that is not sugary sweet, but richly satisfying for the true chocoholic.  The texture is thick and creamy with a decadence that melts in your mouth.  There is a guilty pleasure with each bite, but with no added sugar, eggs, whole milk, or cream, this pudding is almost good for you.  Or at least, you won't miss all the fattening ingredients in a traditionally rich pudding.

While this recipe is very similar to my Chocolate Silk Pie recipe, the peanut butter adds a new undertone, and with a more "milk to chocolate ratio", the pudding is less dense and more silky on the tongue.  It is an excellent chocolate pudding for adults who like chocolate and peanut butter -- like me!  And thus, it is a perfect chocolate pudding for vegan-me as I celebrate another birthday.  Happy Happy to me!

The ingredients:
  • 1 cup bittersweet chocolate chips (or semi-sweet or combination, depending on your preferences and what you have available)
  • 5 T smooth peanut butter (use a natural unsalted peanut butter with no extra sugar if you can)
  • 1 1/3 cup unsweetened almond milk (or soy)
  • 2 t pure vanilla extract
The directions:
  1. In a small pot over medium heat whisk together the almond milk and peanut butter. Heat till the peanut butter melts.
  2. Add the chocolate chips and vanilla and whisk until chips are melted.
  3. Remove from the heat and whisk until everything is smooth.
  4. Scoop into individual bowls or four 5 oz. ramekins and cover. The pudding will be runny, but will firm up in the fridge.
  5. Chill at least one hour (or until firm) and serve cold.    
* A special thanks to my friend Tony for taking the more professional, up-close shots of this pudding (the first and last photo in this blog).  We had fun "food-styling" this dessert!

Friday, January 27, 2012

"America's Favorite" Chocolate Cake Day

Today is National Chocolate Day, and in celebration, I knew I needed to bake a cake.  As much as I enjoy my drinking chocolates and chocolate croissants, I have to admit that there's something about a good chocolate cake that satisfies me.
Even a "not so good" chocolate cake can hit the spot when the cravings come.  And I must confess that I've given into the temptation and indulged in Safeway double chocolate muffins just because I was in the mood!

Recently, someone at work mentioned a fast and healthy chocolate cake recipe.  Add canned pumpkin to a box chocolate cake mix, and voila!  A chocolate cake that is low in fat, high in fiber, and good for you -- I was intrigued.  Thus, in celebration of National Chocolate Cake, I decided to give it a try. 

Searching on line to verify that it could be so simply, I found that it was.  15 ounces of canned pumpkin (not pumpkin pie filling) and a standard box cake mix were all that were required. I located all the ingredients from Safeway for under $4.00, which was about the same price I paid for the 4 chocolate muffins a few days earlier.

For ingredients, I chose the Duncan Hines Devil's Food "Moist Deluxe" cake mix, not because it was labeled "America's Favorite Cake!" but because it was on sale and the cheapest.  And I chose Libby's 100% Pure Pumpkin, not because it was labeled "America's Favorite Pumpkin," but because it was the only brand they had.

With "America's Favorite Pumpkin," mixed with "America's Favorite Cake," this was bound to be a winner, "America's Favorite", right?

As I opened the package of cake mix, the fresh smell of chocolate was intoxicating and sent me into a momentary chocolate high.  I was in heaven.  When I opened the canned pumpkin, however, the earthy pungancy brought me back to reality and I had serious doubts about whether these two flavors would mix.  Visually, it also didn't look all that appealing.

In combining the pumpkin and the chocolate cake mix with a spoon, I had been warned that the batter would be thick.  And it was.  No mixer here as my arms were getting tired.  As I continued to mix and do my best to break down the lumps of dry cake mix, the batter took on a red velvet color.  It was actually looking pretty good.

With my arm feeling like it was going to come off, I knew I had mixed long enough.  I then attempted to pour the batter into a greased bundt cake pan.  It was not working.  Thus, I scooped out the batter and then spread it in the pan to even it out.  It looked like a brownie mix in a bundt pan.  I was again having my doubts about this but I pressed on.

Into a 350 degree pre-heated oven, and with fingers crossed, the cake began its baking transformation as I licked the bowl and spoon.  The batter tasted good, and with no raw eggs to worry about, I licked everything clean.

Because this cake has no water, oil, or liquid, I was worried about overbaking it and drying it out. Thus, I set the time for 45 minutes.  The sweet smell of chocolate cake soon filled the kitchen, but when the timer went off, 45 minutes wasn't long enough; the toothpick didn't come out clean.  The cake did rise, however, and actually looked like a chocolate cake.  I was hopeful.

After another 4 minutes, then another 4, then another 4, the toothpick finally emerged clean.  I was getting worried.  The total baking time -- 57 minutes, nearly 1 hour. 

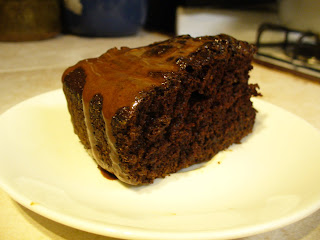
I allowed the cake to cool.  And after about 30 minutes, removed it from the pan to cool on a plate.  It looked and smelled good.  But it needed to cool so I could top it with some powdered sugar before the real test: the taste test.

And the result?  I was very surprised.  It's actually very much YUM!  Though not light and fluffy, the cake has a thick, muffin-like consistency. But unlike the Safeway muffins which were dry and a bit one-note (even with chocolate chips), it is moist, and has a complexity of flavor.  It's hard to describe but it's sort of bright, floral, and fruity.  It has that American, "Hershey-inspired", chocolate taste that European's look down upon.  Thus, for our American, "National' Chocolate Cake Day, it is a winner, full of "America's favorites".

Though this cake does not have a deep, rich, dark chocolate flavor, it's not pumpkin-flavored either.  If I didn't know there was pumpkin in the mix, I probably wouldn't have guessed.

And in reading through the ingredients, I discovered that this cake is vegan!  There are no animal products in the boxed cake mix, nor in the canned pumpkin.  Thus, this cake is definitely a winner.  It is fast, simple, healthy, and VEGAN.  I will definitely try it again, and when I do, I'm adding some good quality chocolate chips!

Give it a try today and let me know what you think.
Happy National Chocolate Cake Day!

Saturday, October 15, 2011

Chocolate for Grown-ups

Friends who've known me for years find it odd that I now have such a chocolate obsession. The reality is I never liked chocolate until I began losing weight about 7 years ago. One day the chocolate lust hit and it hasn’t yet gone away.  And though I now dabble daily in some form of chocolate, the 40 pounds have not come back.  Really.

Running helps.  As does moderation.  And a vegan diet doesn't hurt either, though chocolate (and chocolate cake in particular) is one of my non-vegan exceptions.

Another thing that helps is my maturing chocolate palate.  The overly sweetened stuff has never tempted me, and I am not big on chocolate confections or candy.  I like my chocolate dark and dense, and thus, a little nibble (okay, a few little nibbles) of a good chocolate cake or a few sips of an excellent drinking chocolate will often satisfy me.

As my preferences in chocolate become more refined, they are beginning to discover "chocolate for grown-ups".  I've always enjoy chocolate and alcohol, reflected in my attempt to bake a chocolate whiskey cake last year.  But beyond that I'm discovering some other chocolate-alcohol pairings.

One of my favorite "chocolate for grown-up" discoveries is what I call, "adult s'mores".  My sweetie celebrated a birthday last weekend up in the redwoods.  After dinner, around the campfire, I introduced my version of this "spiked" childhood favorite. Our friends loved them.

The traditional version of a s'more is Hershey's milk chocolate and a roasted marshmallow, sandwiched between two graham crackers.  (Believe it or not, while growing up and not liking chocolate, I used to eat s'mores without the chocolate - just marshmallows and graham crackers.  How times have changed!)

S'mores may be sticky and messy, but they are a campfire tradition and an addiction as the term, "s'more", is a contraction of "some more".  Kids love s'mores, and adults do, too.  But to be honest, they are simply sweet upon sweet, overly sweet.  The adult version takes the s'more to the next level by cutting the sweet in half, creating a better balance of flavors, and providing a sophisticated twist on this childhood snack.

It begins with the ingredients: (1) A good dark chocolate, which is vegan - we used Guittard 91%;  (2) marshmallows or if you want, Sweet and Sara does offer a vegan version;  (3) graham crackers, which are often vegan if you don't buy a honey-added brand; and the pièce de résistance, (4) Kahlúa, a Mexican coffee-flavored rum-based liqueur, which is also vegan.  (See how easy it is to create yummy, animal-friendly, vegan desserts!)

You begin by first splitting the graham cracker into two, and placing a hunk of chocolate on one side.  You want to have everything ready to go so that when the marshmallow is toasted to your liking, you don't need to wait and have the marshmallow cool down.

Next, place a marshmallow on a stick and then soak it in Kahlúa.  The marshmallow needs to be soft so that the Kahlúa can seep into the center and not just coat the outside.  The longer the soak, the deeper the flavor.  I like to keep it in for a few minutes.

Once the marshmallow has been "Kahlúa-d", toast it over a campfire or coals (or a stove).  Some like their marshmallow blackened and scorched.  I like mine, golden-brown and gushy to the touch all the way around.  This ensures that when sandwiched betwen the graham crackers, the marshmallow  will melt the chocolate as the gooeyness oozes. Ahh... I can just taste it.

The bittersweet notes in the 91% chocolate beautifully cut the sweetness of the marshmallow.  The Kahlúa adds caramel and vanilla undertones, which create a delicious flavor profile that beats out, in my opinion, a traditional s'more any day. You need to give this a try and discover that s'mores aren't just for kids anymore.  Neither are they just for campfires (or non-vegans). 


Another "chocolate for grown-ups" I've found is 360 Double Chocolate, a chocolate flavored vodka, which has won multiple taste awards.  On its website, 360 (the world's first eco-friendly vodka) writes: "Think of everything you love about chocolate. Then double it. Rich. Smooth. Silky. The flavor of temptation. This is chocolate to the intense degree."  And with 360 Double Chocolate, I would agree.

We first sampled this chocolate vodka at the Ghirardelli Chocolate Festival last year.  What first impressed us was the smell of chocolate which wafted from the vodka.  It smelled heavenly.  But what blew us away was the flavor.  The depth of chocolate is incredible as it seems to enfold the vodka on your palate before the vodka bursts forth and settles smoothly on your tongue.  It is very satisfying, and because vodka is meant to be sipped, a little goes a long way in quenching the desire for chocolate as well as alcohol.  Three sips and I'm done.

But I've found that a teaspoon (or two) of chocolate vodka with a 6 ounce prepared powdered hot chocolate brings a mediocre hot cocoa to the next level.  It makes a kid's drink, an adult obsession.  The smoothness of the vodka adds a silkiness to the flavor, while undercutting the sugar.  When added to a mug of quality hot chocolate, the chocolate vodka makes an excellent drink, even better.  The vodka seems to bring out the best flavor notes in the chocolate.  And on a cold night, hot chocolate with a touch of vodka warms the body and pleases the spirit.

There are many other types of "chocolate for adults" which I am only beginning to discover.  There is a slew of chocolate beers now on the market, while chocolate liqueurs continue to be used in recipes or enjoyed straight.  Chocolate and wine pairing is a big trend, with chocolate wine just beginning to hit the market.  There's  even an Adult Chocolate Milk now, which is a 40-proof alcoholic drink. 

So much adult chocolate, so little time. Yet I'm realizing that I do not enjoy the chocolate and alcohol pairing as much as I enjoy a different chocolate pairing.  To find out what that is, you'll need to check out the blog tomorrow as my celebration of Chocolate Week wraps up with my latest chocolate obsession.

Friday, October 14, 2011

How to Make Hot Cocoa from Cacao Beans


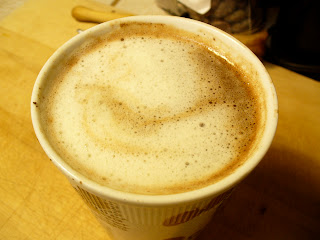
Thanks to Bean Street in San Mateo, I've come to appreciate hot cocoa made from roasted cacao beans.  Next to cioccolata calda, it's my new standard in drinking chocolate.  

Personally, I find hot cocoa brewed fresh from roasted cacao beans to be a wonderfully inviting drink. With the consistency of coffee, it is different than the creamy and thick cioccolata calda, but has those same chocolate undertones which get lost in the over-sweetened, over-processed, pre-packaged hot cocoas on the market.   While I still enjoy hot cocoa (from powder) and hot chocolate (from bars), depending on my mood, I find my taste buds shifting.  My daily chocolate fix is becoming more hot cocoa from the bean, or as I am beginning to say, "hot cacao," to distinguish the difference.  

Brewed hot cacao from the bean is a new trend, and I agree with John Nanci, the Chocolate Alchemist, that it is a different taste experience.  He writes: "Brewed cocoa, regardless of source, is not an intense, thick mouth coating drink like many are accustomed to in hot chocolate or the other various processed chocolate drinks.  It’s more subtle and sublime than that.  It is its own drink.  If you compare it to hot chocolate, you may come away disappointed.  If you evaluate it for it own flavor and merits, I think you will come away impressed."

I know I am totally impressed, as I savor my fresh brew made this morning from my stash of earthy, organic, Fair Trade, Dominican Republic, “Conacado” 2010 cacao beans. As I explore and sample different beans and learn to describe the different flavor points, I know I am becoming even more of a cocoa connoisseur, a cacao enthusiast, and yes, I admit it, a "chocolate snob".  My taste buds are expanding and maturing, but more on the "mature" aspect of chocolate tomorrow.

For today, here's the method the baristas at Bean Street taught me which I've adopted for my home purposes and preferences.

1. Begin boiling water.  Turn off when done.

2. Select about 2 tablespoons of your favorite roasted cacao bean (About 20 beans. I find it easier to count than to measure).

3. Grind the beans in a standard coffee grinder for about 45 seconds.  After about 30 seconds you will begin to smell the rich chocolatey aroma of the cacao beans.  As the cocoa butter is released, the ground beans create an oil brown muddy sludge on the bottom and edge of the grinder.  That's how you know you're done.
 

4. Use a spoon to remove the ground beans and place in an espresso frothing pot, or a similar container.  You may also want to use a coffee brush to clean out the cacao grounds from the grinder.

5. Add about 1 cup (8 ounces) of boiling water into the pot with the ground cacao beans and give the brew a stir with a spoon.

6. Brew for about 4 minutes, longer if you want a more intense flavor.
7. Pour the brewed cacao through a fine strainer into a mug which is at least 12 ounces.  

8. Use a spoon to assist the hot cocoa as it strains and as the grounds clog the flow by moving the grounds and pressing the remaining liquid through the strainer into the mug.

9. Add a sweetner.  For simplicity, I use about 3 teaspoons of Torani's French Vanilla, but I've also used about 3 teaspoons of agave nectar with about 3 teaspoons of pure vanilla extract.  Both are great.  Other Torani flavors may also be used, but of the ones I've sampled, vanilla is the best.

10. Heat 1/2 cup of milk of your choice to 140-160 degrees using an espresso machine frother or any other method you prefer.  I found the espresso machine to be the easiest.

11. Pour the steamed milk into the mug and top with some froth.

12. Stir as needed, especially if using soy milk, and ENJOY!

If you'd like more insights on brewing cacao, check out Chocolate Alchemy's recent blog on the subject here.  And if you have questions, don't hesitate to ask by leaving a comment below.  Happy Chocolate Week!

Sunday, June 26, 2011

Happy Pudding Day to Me

I can't say that I'm a big fan of chocolate pudding, but last year, when I discovered that my birthday coincides with National Chocolate Pudding Day, I knew that I needed to grow more familiar with this dessert. Thus, I started a new tradition of trying a vegan chocolate pudding recipe each year to celebrate my birthday, and to celebrate chocolate pudding. Go us!

Last year, my attempt didn't sell me on chocolate pudding. And to be honest, I've not tasted a chocolate pudding since. But with another birthday here, I knew I need to make another go at it.

Being busy with family in town, I wanted to make something very fast and simple, yet still be healthy and vegan. Even though I did collect some recipes to try this year, while browsing the chocolate section at New Leaf Community Market, something caught my eye -- Mori-Nu Mates Chocolate Pudding mix.

According to the package, it's simply add tofu and water, blend, and its done. It couldn't be more simple. And it's versatile. Double the recipe, decrease the water and you can make a chocolate pie filling (though I doubt it will be as yummy as mine!)

Adding to the intrigue of this "instant" chocolate pudding mix, it is vegan and all natural; it has no refined sugar, is low in fat, high in protein, and has no cholesterol. In other words, for a chocolate pudding, it's actually fairly healthy. And for only $1.89 for the mix, and $1.29 for the tofu (which was on sale), it was a good price. I knew I needed to give this a try. Happy Birthday Pudding for just over $3.00! (And it serves 4.)

Following the directions, I blended the 12.03 oz box of Silken Lite Tofu with 4 tablespoons of water in my food processor. Once creamy, I added the pudding powder and continued to blend, stopping the machine, scraping the sides, stirring, and then continuing to blend.

Initially, the pudding looked grainy, but as instructed, after 2 minutes of blending, the pudding began to look light and creamy. I was impressed. In under 5 minutes, I had pudding.

Though it passed the fast and simple test, the real test would be the taste. The directions say to "Scoop into pudding cups and chill." However, I decided to give it an initial try in the processor at room temperature.

In spite not having your typical milk or dairy, this pudding was very creamy in its texture as well as in its taste. There was a lightness to the chocolate flavor, not so much in terms of being a milk chocolate flavor, but a mildness that you'd find in a mousse. The chocolate was subtle in its tones, and tended to highlight the flavor of the dutch chocolate cocoa powder it contained. The chocolate taste was not overly sweet, and had a subtle coconut accent. It was nice, but most important, it did not have that tofu aftertaste that some do not like.

After scooping the contents into containers and letting them chill, I licked the food processor clean (well, nearly clean).

At my birthday dinner, I brought out this chocolate pudding for my family to try. Refrigeration did not change the flavor. While the adults were not so keen on the taste, my nieces however loved it and goobled it up, preferring the pudding to the chocolate cake they helped make! They even liked this pudding better than the one they had the day before in a kid's meal at Six-Flags Discovery Kingdom.

Overall, the Mori-Nu Mates Chocolate Pudding was light, creamy, and mild -- very different from the dark, dense, and bittersweet flavors that I enjoy in a chocolate cake. With its creamy chocolate subtlety, this instant vegan chocolate pudding paired nicely with the homemade vegan chocolate birthday cake, and would make a delicious filling for a 2-layered cake. As a pudding, it was enjoyable and something that I'd try again, especially since it is healthy and my nieces did love it. Not a bad chocolate pudding to celebrate 2 special occasions on this important June day!

Thursday, January 27, 2011

Happy Chocolate Cake Day!

To make sure we have things straight -- in this blog, I have never claimed to be a baker, let alone a good one. I simply love chocolate, especially chocolate desserts, and in my pursuit of the "perfect chocolate cake", I want to capture my adventures and discoveries. Unfortunately, if you've read my blog, you know that my attempts at creating in the kitchen have led to more chocolate missteps than successes.

With January 27th being "Chocolate Cake Day" however, I thought I'd give the kitchen another try and celebrate by baking a chocolate cake. With few recent baking successes and also feeling rusty in the kitchen, I decided to attempt something basic, simple, and beginner, in spite having just heard my chocolate mentor Alice Medrich speak.

A friend posted a mocha glaze recipe on Facebook and when emailing it to me, she suggested I attempt it and review it. She used the glaze on Hershey's "Perfectly Chocolate" Chocolate Cake, loved it, and with the recipe skill level listed online as "beginner," I thought this would be a good way to get back into the chocolate game. And besides, I am in pursuit of the "perfect" chocolate cake.

Though the recipe is clearly NOT vegan with its use of eggs and milk, I decided to stick with the recipe to build up my chocolate baking confidence in the kitchen. Watching FoodNetwork reality shows, I am learning that it is important to master basics in the kitchen before being creative. And with baking more of a science than an art, I know I need to better understand how essential ingredients react before substituting them out for more animal-friendly ones.

Thus, I followed the recipe very closely -- though I did cut it in half as I don't need a 2-layered cake to celebrate Chocolate Cake Day. Keep it simple. After preheating the oven, greasing and flouring the pan, I combined the 1 cup sugar, 3/4 cups plus 2 tablespoons of flour, 1/2 cup plus 2 tablespoons of Hershey's unsweetened cocoa, 3/4 teaspoon of baking powder, 3/4 teaspoon of baking soda, and 1/2 teaspoon of salt. So far so good.

After I added the wet ingredients - one egg, 1/2 cup of milk, 1/4 cup of canola oil, and 1 teaspoon of vanilla - I went to get the electric mixer I had borrowed from my mom so to combine the ingredients. (I do not yet have my own mixer.) In reaching for the box I had brought from my parents home, I discovered to my horror that the blades to this mixer (which is probably older than me) were missing!

While searching my mom's cabinets for the mixer earlier this week, I vaguely remember the box opening backwards and falling, but I never suspected that something fell out. Rummaging around through my stuff, I knew that the blades were not here and that I would need to improvise. "So much for baking success," I began to think.

Rather than "beat on medium speed for 2 minutes" as the recipe instructs, I simply beat on "cacao-me speed" while waiting for the water, I would next need, to boil. Though I experienced a momentary set-back, as the ingredients blended and I mixed mixed mixed, the smell of chocolate filled the air. It was quiet heavenly. May be I could salvage this after all.

After the water boiled, I added 1/2 cup to the batter, stirring it in as it thinned as the recipe said. I then poured it into my pan (OK, my mom's round cake pan), and let it bake. After about 30 minutes, I went to check on it.

To my horror, it looked like a moonscape with lava rocks, which might have been okay if I was making a "lava cake," but no. This was the beginner's "perfect" chocolate cake and somehow I had messed it up. Inserting the toothpick, I saw that it was done. I took it out to cool, and decided that if they had a show called, "Worst Baker in America" (in the vein of FoodNetwork's "Worst Cooks in America"), I'd be a good contender. Sigh.

Oh well. "May be if I cover it with the glaze no one will know."

Following my friend's glaze instructions, I combined 2 teaspoons of hot double shot espresso, 3/4 teaspoon of unsweetened cocoa, just under 1/4 cup powdered sugar (as she said she would make it less sweet next time), and 1/4 teaspoon of vanilla. Mixing it, the glaze began to smooth and yes, it tasted just like coffee nip candy as my friend said, though not as sweet. Adding less sugar gave it a nice kick which I liked. This part of the cake was working out -- until I realized that this was far from enough to cover the cake.

I made another batch and would have made a third and fourth, except I was running out of ingredients. This would have to do. Though the glaze was tasting good, it was not hardening up. "May be when the glaze cools it will stiffen," I thought. I began to drizzle it on, but unfortunately it did not cover my chocolate moon rocks. It simply flowed around the bumps like a chocolate lava flow, and looked rather sloppy as it harden. May be the taste will save this next kitchen chocolate nightmare.

Thankfully, though it looks like a some alien nightmare on the surface, I am glad to say it doesn't taste like it. (Whew!) Cutting a slice, the cake is moist and fluffy, nicely baked, with a balanced chocolate flavor. It is surprisingly not too sweet, in spite having more sugar than flour. Though it doesn't have the dark chocolate bittersweet bite and rich denseness I prefer, for a simple straight forward (not from a box) chocolate cake, it is very good.

What adds the chocolate sophistication to the cake is the mocha glaze. The wonderful edgy bite of the espresso brings out the simple chocolate flavors of the cake underneath, and raises this dessert from "at home" enjoyment to restaurant indulgence (as long as you don't look too closely at it!) Probably multiplying the mocha glaze recipe so that there is enough to fully cover the top of the cake, and then adding it as a filling with a second layer, would make this an excellent gourmet sophisticated chocolate dessert. Add a scoop of French vanilla ice cream and you have a real winner.

The lesson from this baking adventure: a good chocolate dessert begins with the essentials - it builds off a good chocolate cake.

Though this baking attempt did not produce a "pretty" cake, it did provide the foundation upon which to build a pretty delicious dessert. And in the same way, though my baking skills are far from honed, I know I am learning some essential skills I need to be more proficient in the kitchen baking with chocolate.

One think that will definitely help me in the process is my own electric mixer.