Showing posts with label chocolate lessons. Show all posts

Thursday, January 27, 2011

Happy Chocolate Cake Day!

To make sure we have things straight -- in this blog, I have never claimed to be a baker, let alone a good one. I simply love chocolate, especially chocolate desserts, and in my pursuit of the "perfect chocolate cake", I want to capture my adventures and discoveries. Unfortunately, if you've read my blog, you know that my attempts at creating in the kitchen have led to more chocolate missteps than successes.

With January 27th being "Chocolate Cake Day" however, I thought I'd give the kitchen another try and celebrate by baking a chocolate cake. With few recent baking successes and also feeling rusty in the kitchen, I decided to attempt something basic, simple, and beginner, in spite having just heard my chocolate mentor Alice Medrich speak.
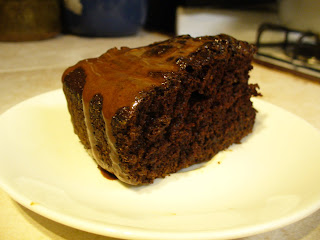
A friend posted a mocha glaze recipe on Facebook and when emailing it to me, she suggested I attempt it and review it. She used the glaze on Hershey's "Perfectly Chocolate" Chocolate Cake, loved it, and with the recipe skill level listed online as "beginner," I thought this would be a good way to get back into the chocolate game. And besides, I am in pursuit of the "perfect" chocolate cake.

Though the recipe is clearly NOT vegan with its use of eggs and milk, I decided to stick with the recipe to build up my chocolate baking confidence in the kitchen. Watching FoodNetwork reality shows, I am learning that it is important to master basics in the kitchen before being creative. And with baking more of a science than an art, I know I need to better understand how essential ingredients react before substituting them out for more animal-friendly ones.

Thus, I followed the recipe very closely -- though I did cut it in half as I don't need a 2-layered cake to celebrate Chocolate Cake Day. Keep it simple. After preheating the oven, greasing and flouring the pan, I combined the 1 cup sugar, 3/4 cups plus 2 tablespoons of flour, 1/2 cup plus 2 tablespoons of Hershey's unsweetened cocoa, 3/4 teaspoon of baking powder, 3/4 teaspoon of baking soda, and 1/2 teaspoon of salt. So far so good.

After I added the wet ingredients - one egg, 1/2 cup of milk, 1/4 cup of canola oil, and 1 teaspoon of vanilla - I went to get the electric mixer I had borrowed from my mom so to combine the ingredients. (I do not yet have my own mixer.) In reaching for the box I had brought from my parents home, I discovered to my horror that the blades to this mixer (which is probably older than me) were missing!

While searching my mom's cabinets for the mixer earlier this week, I vaguely remember the box opening backwards and falling, but I never suspected that something fell out. Rummaging around through my stuff, I knew that the blades were not here and that I would need to improvise. "So much for baking success," I began to think.

Rather than "beat on medium speed for 2 minutes" as the recipe instructs, I simply beat on "cacao-me speed" while waiting for the water, I would next need, to boil. Though I experienced a momentary set-back, as the ingredients blended and I mixed mixed mixed, the smell of chocolate filled the air. It was quiet heavenly. May be I could salvage this after all.

After the water boiled, I added 1/2 cup to the batter, stirring it in as it thinned as the recipe said. I then poured it into my pan (OK, my mom's round cake pan), and let it bake. After about 30 minutes, I went to check on it.

To my horror, it looked like a moonscape with lava rocks, which might have been okay if I was making a "lava cake," but no. This was the beginner's "perfect" chocolate cake and somehow I had messed it up. Inserting the toothpick, I saw that it was done. I took it out to cool, and decided that if they had a show called, "Worst Baker in America" (in the vein of FoodNetwork's "Worst Cooks in America"), I'd be a good contender. Sigh.

Oh well. "May be if I cover it with the glaze no one will know."

Following my friend's glaze instructions, I combined 2 teaspoons of hot double shot espresso, 3/4 teaspoon of unsweetened cocoa, just under 1/4 cup powdered sugar (as she said she would make it less sweet next time), and 1/4 teaspoon of vanilla. Mixing it, the glaze began to smooth and yes, it tasted just like coffee nip candy as my friend said, though not as sweet. Adding less sugar gave it a nice kick which I liked. This part of the cake was working out -- until I realized that this was far from enough to cover the cake.

I made another batch and would have made a third and fourth, except I was running out of ingredients. This would have to do. Though the glaze was tasting good, it was not hardening up. "May be when the glaze cools it will stiffen," I thought. I began to drizzle it on, but unfortunately it did not cover my chocolate moon rocks. It simply flowed around the bumps like a chocolate lava flow, and looked rather sloppy as it harden. May be the taste will save this next kitchen chocolate nightmare.

Thankfully, though it looks like a some alien nightmare on the surface, I am glad to say it doesn't taste like it. (Whew!) Cutting a slice, the cake is moist and fluffy, nicely baked, with a balanced chocolate flavor. It is surprisingly not too sweet, in spite having more sugar than flour. Though it doesn't have the dark chocolate bittersweet bite and rich denseness I prefer, for a simple straight forward (not from a box) chocolate cake, it is very good.

What adds the chocolate sophistication to the cake is the mocha glaze. The wonderful edgy bite of the espresso brings out the simple chocolate flavors of the cake underneath, and raises this dessert from "at home" enjoyment to restaurant indulgence (as long as you don't look too closely at it!) Probably multiplying the mocha glaze recipe so that there is enough to fully cover the top of the cake, and then adding it as a filling with a second layer, would make this an excellent gourmet sophisticated chocolate dessert. Add a scoop of French vanilla ice cream and you have a real winner.

The lesson from this baking adventure: a good chocolate dessert begins with the essentials - it builds off a good chocolate cake.

Though this baking attempt did not produce a "pretty" cake, it did provide the foundation upon which to build a pretty delicious dessert. And in the same way, though my baking skills are far from honed, I know I am learning some essential skills I need to be more proficient in the kitchen baking with chocolate.

One think that will definitely help me in the process is my own electric mixer.

Sunday, January 23, 2011

Conversations in chocolate

I was in a chocolate awe this afternoon, and it had nothing to do with what I ate.

In connection with "Good Foods Month," I received an email about a panel discussion on chocolate careers featuring five of the Bay Area most accomplished chocolate professionals. Though I can't say that a chocolate career is in my future, I had the time, and I was curious about what they were going to say. Thus, I registered and spent about 90 minutes at the San Francisco Art Institute, the host site, listening and learning about what it takes to be in the chocolate business and the challenges these seasoned professionals face as entrepreneurs and women.

One reason I wanted to attend was to hear Alice Medrich (pictured right), my chocolate mentor through my study bake attempts last year. Unfortunately, I forgot to bring one of my growing collection of Alice's books for her to sign and to be the total groupie. And I forgot to bring my camera thus needed to use the camera function on my old (not smart) phone to take pictures. Thus I have blurry shots.

Another person on the panel I wanted to hear was Penelope Finnie (pictured left in the picture below), owner of Bittersweet, one of the few places in the Bay Area that serves a dark bittersweet cup of drinking chocolate. Because I have since sampled other types of drinking chocolate or "cioccolata calda" in Italy (and need to review more of them on this blog), I was able to talk with her and suggest she offer a thick European-style chocolate at their cafe, which I do love. She said she's heard this suggestion before and will consider it. I mentioned that I have been trying some samples of drinking chocolate which I picked up in markets while traveling in Italy, and she said to email her if I find one I like. I plan to, and hope to see a thick drinking chocolate at Bittersweet sometime soon!

Other members of the panel included Thalia Hohenthal (pictured left in the center), food scientist at Guittard Chocolate Company, Zohara Mapes (pictured left on the right), chocolatier at TCHO, and Kathy Wiley, owner of Poco Dolce.

Topics this distinguished group of chocolate professionals shared about included:
  • how they first decided to enter the business,
  • what an average day looks like,
  • how their love of chocolate influences their choice of foods,
  • how they are breaking ground as women in a male dominated field,
  • what they think of the new "art" in chocolate with new flavor pairings,
  • how they describe chocolate as tasting is a big part of what they each do,
  • what they would suggest for someone looking to turn their "passion" into "profit"
While there were many stories shared of the hard work and dedication needed to succeed and the challenges faced including tasting after tasting after tasting, one thing I appreciated from the Q&A time was Thalia's 6 point rating of chocolate. It is:
  • yum yum yum
  • yum yum
  • yum
  • yuck
  • yuck yuck
  • yuck yuck yuck
For Thalia there is no zero, no middle ground when it comes to chocolate. You must decide one way or the other - yum or yuck. Alice agreed and confessed that she tends to not have an extensive vocabulary to describe chocolate and tends toward the "yum or yuck" scale. Rather than use standard chocolate descriptions as found in the media (like "fruity" or "floral"), she believes it is more valuable to have a kid's vocabulary when it comes to chocolate because it moves quickly to the bottom line - whether you like it or not. And that's important because chocolate is such a personal thing.

I appreciate this, because personally I too do not yet having an extensive vocabulary in my ability to describe chocolate. My taste pallet is not well develop and I don't have the words to describe what I taste. I simply know if I like something or not. It's nice to know that I have a chocolate professional like Alice in my corner. That's why she continues to be my chocolate hero.

Wednesday, April 14, 2010

More Mousse-Adventures in Baking

There was something about the simplicity of having only three ingredients that intrigued me. But after another chocolate baking experience that left me scratching my head and asking, "what went wrong?" I think I've learned my chocolate "study bake" lesson -- Alice does know best.

With the thesis out of my hands and in the hands of readers, and before diving into another round of papers, I decided to rest my weary brain by breaking with some baking.

My mom had a solid 7-oz. milk chocolate Hershey kiss which needed to be used, and on-line, I found a simple recipe for Milk Chocolate Mousse cupcakes that looked easy and required the exact amount of chocolate I needed to use. Stepping away from my beloved Alice and her Bittersweet recipes yet again, I thought this would be a breeze "study bake" with only 3 eggs, 1/8 cup plus 1 T flour, along with the 7-oz. of chocolate. Little did I know.

My mom wasn't sure when she received this enormous chocolate kiss as a gift. It had been sitting around for a while, and I wondered if it had "bloomed."

Chocolate "blooms" when it develops a gray appearance. This discoloration does not indicate spoilage but is only a cosmetic effect which occurs as the cocoa butter in the chocolate separates, floats to the surface, and crystallizes. Bloom doesn't effect taste; it just doesn't look very pretty.

When I unwrapped the chocolate kiss, I was pleasantly surprised to find that it still had that brown Hershey kiss color. I was expecting it to be discolored, which is the reason I thought to use it, but nonetheless, into the make-shift double boiler it went.

Now if this was an Alice recipe, it would probably have read -"melt chopped chocolate in a double boiler." But since this was NOT an Alice recipe, and since I am still an ignorant amateur in baking with chocolate, I placed the solid chunk of chocolate in the double boiler, over simmering water.

Imagine Jeopardy music if you will, because it took a LONG time for those 7 ounces of chocolate to melt. It wasn't until a few minutes into this melting ordeal that I realized that chopping it first would have cut the time down considerably.

The Family Circle recipe for these Milk Chocolate Mousse Cupcakes indicates that prep time is 5 minutes, with total time being 19 minutes. I didn't set an official time, but it took at least 10 minutes to get the chocolate melted! So much for a short and simple "study bake". Oh Alice, I miss you.

As the block melted down, I kept expecting the milk chocolate to become more liquidity, similar to the dark chocolate melting I have grown accustomed to. Unfortunately, it never achieved that consistency. Now if this were an Alice recipe, she would have mentioned that milk chocolate melts differently than dark and because of the milk fat, doesn't attain the smooth satiny flow I've grown accustomed to working with.

After a long while of continuous stirring so as to not burn the chocolate, I figured this is the way this chocolate will be and I decided to continue on with the next recipe step. "Stir eggs and flour into melted chocolate with wire whisk or wooden spoon." Sounds easy enough.

However, as I incorporated the eggs into the melted chocolate, I began to see yellow and quickly realized the eggs were beginning to cook. The chocolate was too hot! If this were an Alice recipe, she would have indicated the proper chocolate temperature and I would have stuck in my thermometer and added the eggs at just the right time. But no.

Instead of looking like a cupcake batter, my concoction was beginning to look like chocolate scrambled eggs! I quickly added the flour and continued to furiously whisk. I don't have a picture of what this looked like, because I needed to keep beating the ingredients before the eggs really cooked up solid. Who knows what would have happened if I stopped to take a picture?

With the chocolate cooled and ingredients incorporated, I laded the lumpy yellowy batter into the lined cupcake tins, and baked at 325 degrees. For baking time, the recipe says, "12 minutes or until sides of cupcakes are set but centers are still liquid." After 10 minutes, I checked and realized I had no idea what I was looking for. How do I know the sides are set and centers are liquidy? Alice would have provided better indication on how to determine doneness. I decided to simply pull them out of the oven after 12 minutes and let these cupcakes be what they will be.

As soon as the suggested 10 minute cooling period was done, I grabbed one, peeled off the liner, and broke it open. To my disappointment, no liquid. And after a first bite, I don't know why the chocolate custard taste of this cupcake surprised me. This warm dense and doughy cupcake was definitely more egg-like than mousse-like in both consistency and taste. There was nothing light, airy, or fluffy about this Milk Chocolate "Mousse" Cupcake.

It wasn't bad. Yet it wasn't very good either. It was a bit odd and I was disappointed. And as my mom said, "They are sweet." And sweet they were, especially in comparison to all the bittersweet chocolate desserts I have been attempting.

I am definitely learning my lesson. Alice knows best. It is back to bittersweet baking I go. Or maybe, rather than baking, I'll just go back to eating and reviewing chocolate. There are definitely less disappointments in that department.

Wednesday, March 31, 2010

"Study Bake" Brownies

I had been waiting for the right moment to make them. With no papers pressing, the morning sun gone, and rain clouds moving in, the afternoon seemed right to take a study break and stretch my emerging chocolate baking skills with Alice Medrich's recipe for Classic Unsweetened-Chocolate Brownies from her book, Bittersweet.

A friend suggested I call my "study break bake" a "study bake," and this round was definitely a study in baking brownies as I needed to adjust the amount of ingredients because of the chocolate I would be using.

A few months back, my mom received an 85% cacao, 3.5 oz bar of Valrhona. A bit too bitter to eat as a bar, this very excellent chocolate needed an excellent recipe to showcase it. The problem: I could find no recipe that uses an 85% bar. Recipes are based on the standard 58%, 66%, or 70% blend of chocolate liquor with the requisite sugar to total 100%. Alice's book makes it clear that stronger chocolates can affect the taste and texture of recipes in unexpected ways because of the chocolate and sugar percentages, thus other ingredients need to be adjusted appropriately.

Alice writes, "The effect of increasing liquor and decreasing sugar is exaggerated because manufacturers usually add less extra cocoa butter to chocolate when they increase the total amount of chocolate liquor (which has cocoa butter in it), so the amount of nonfat dry cocoa solids increase more than the fat as the percentage of chocolate goes up. The effect of using a higher-percentage chocolate is a little like adding cocoa powder to a recipe and subtracting sugar at the same time" (p. 345).

Get that? That's why this was definitely a "study bake" brownie. I needed to calculate the decreased amounts of sugar and butter and the increased amount of chocolate required for this recipe to compensate for the 85% bar. Add to this the fact that the recipe called for 4 oz. of chocolate, I only had one 3.5 oz bar, and I would make up the difference with the leftover 100% squares from the Chocolate Whiskey cake, it became a complicated little equation.

Given that brownies are always yummy as long as they are not totally overbaked and dry, I figured trying to calculate the adjusted amounts for brownies would be safer than attempting something else. And with the taste of brownie comfort still lingering on my palate as I now sit and blog, I think my inclinations were correct - for the most part - at least for taste.

The recipe called for 4 oz of unsweetened chocolate with 8 T (1 stick) butter and 1 1/4 cup sugar. In the appendix of Alice's book, she has guidelines for substituting 50-58%, 62-64%, 66%, and 70-72% for unsweetened (aka 100%) chocolate. No guidelines for substituting 85%, but doing the calculated estimations, I decided to go for 3.5 oz 85% + 1.5 oz. unsweetened, with the full stick of butter and 1 cup of sugar.

After the non-Alice whiskey chocolate cake recipe, I was glad to return to my chocolate diva. I am thankful for the little tidbits she provides to assure the newbie baker I be that I am on the right track.

For example, though I now feel comfortable melting chocolate, this recipe required a slightly different approach. Because all the ingredients would be added into the melted chocolate and butter, the mixture needed to be hot enough. How hot? "Hot enough that you want to remove your finger fairly quickly after dipping it in to test." Taste testing, I mean, temperature testing the chocolate with my finger was not only effective, it was fun, especially since I had the opportunity to lick off and sample the evidence a good 6 times until it was "just right."

After adding the 1 cup sugar, 1 t vanilla, and 1/4 t salt, then the two eggs, one at time, the 1/2 cup flour came next as the batter truly appeared "smooth, glossy." As it began to "come away from the sides of the bowl," just as Alice said it would, I continued to beat with my rubber spatula for 1-2 minutes as instructed. The picture doesn't really reflect it, but I was encouraged to see the batter in my bowl behaving just as Alice said it should. It came from the sides like a big brown glob of liquid silly putty. It was cool.

Because I've learned that my mom's oven is a bit hotter than Alice's, less time is needed. Rather than 20 minutes at 400 degrees, after about 18 minutes, the brownies looked "dry" on the surface and began "to pull away from the sides of the pan," as Alice said they would, indicating they were done. The inserted toothpick was more "gooey," than "quite gooey" when it came out from the center, but the brownies smelled warm and wonderful as the tray went into the ice bath to cool per Alice's instructions.

I probably should have let the brownies cool a bit longer than I did before trying to cut them, but Alice didn't give a time and I was anxious to sample. There's just something about a warm brownie (with walnuts - about 2/3 cup) on a cold and wet day that brings an assuring embrace of comfort.

Though the taste was a bit sweeter than I expected, there was a subtle bittersweet bite that created a wonderfully complex chocolate symphony which is hard to describe in words. The depth of flavor is probably due to the quality of chocolate used. It's sweet - yet not too sweet. It has a bittersweet bite - yet not too bitey. Though there was no coffee or alcohol, there was a rich sophistication. The walnuts created a wonderful balancing crunch to the gooey brownie texture, and stood up to the strong chocolate tones with its bold nutty accents.

While I really like the taste of these brownies (which are definitely better than the boxed ones I've made), I have 3 issues with how they came out. I don't know if it was me, the substitutions I made, or heaven forbid, Alice's recipe, but...

(1) The brownies were a bit oily -- not a bad oily, just a bit oily. I should have went with my original calculations of deleting 1/2 teaspoon of butter rather than being lazy and using the full stick. I think the extra 1/2 teaspoon plus the oily nature of walnuts were a bit too much.
(2) The brownies were crumbly and simply did not hold together well when I cut them.
(3) And as I cut them, they stuck to the foil liner which Alice said to use to get the brownies out of the pan onto a board to cut. She said foil or parchment. I think parchment would have been a better choice.

Thus, if you can imagine, because these brownie were a bit oily, crumbly, and stuck, cutting them was a frustrating nightmare. The one good thing about it all is that the chocolatey mess, which stuck to the cut bits of foil and lay all over the cutting board, did give me an excuse to eat up all the crumbs and to delay the research for another paper. That, I thoroughly enjoyed.

Now it's back to the books.

Sunday, March 21, 2010

Chocolate Whiskey Cake

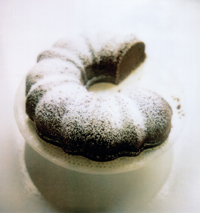
With a mid-term completed, the thesis in the hands of the second reader, and spring break here, I decided to celebrate by attempting a Chocolate Whiskey Cake in honor of St. Patrick's Day and American Chocolate Week. Unfortunately, Alice Medrich's book, Bittersweet (my chocolate bible) doesn't have any chocolate and liquor recipes that seem Irish, so I searched on-line for a cake that contains the ingredients I have and embraces the flavors I enjoy. The Whiskey-Soaked Dark Chocolate Bundt Cake (see left) adapted from the New York Times by Molly Wizenberg seemed to fit the bill.

I admit I felt like I was betraying my Alice by consulting a new chocolate diva. But through each step of this baking journey, Alice was constantly on my mind as I wondered, "WWAD? - What Would Alice Do?" I missed my Alice, whose instructions were always so clear, guaranteeing success. Molly's instructions... well, you'll see.

Originally intended to be a bundt cake using 5 oz of unsweetened chocolate, I cut the recipe in half to make a loaf because I only had one 4 oz 100% cacao bar. I didn't have any other unsweetened bars, and besides, with other recipes to be tried, a full bundt cake felt like it would be chocolate dessert overload requiring me to run more than the 21 miles I already run to keep my weight in check.

There are certain baking skills I feel like I'm slowing getting. Greasing and flouring pans, and melting chocolate are two of them. Skills which require use of the mixer, however, are not yet my forte, especially as I use my mom's old electric hand-held. No stand mixers here. It's still cumbersome for me as I try to hold the bowl and the mixer, scrape down the sides, add the ingredients, and try to not make too much of a mess in the process.

As I began the first part of the mixing, my initial attempt to "beat butter until fluffy" created globs that stuck to the blade things (whatever they're called) as I started it on "low." While Alice would've told me the speed, "high," "medium," or "low," Molly simply said to use an electric mixer. As I regrouped and switched to "medium," the butter began to loosen up and fluff. Or at least I think it was fluffed enough before the sugar, eggs, vanilla, baking soda, and melted chocolate were added. While Alice would've given a description of how long to beat and what the ingredients in the bowl should look like with each addition, Molly's instructions were a bit vague. Thus I kept wondering: Am I overbeating? Am I underbeating? Is this fluffy enough? Should I go longer? Shorter? Faster? Slower? WWAD?

Luckily Molly gave a few more instructions on the final steps as the flour and the coffee/whiskey mixture were added in thirds, and beat on "low." She notes that the final batter "may seem like there's too much liquid, but don't worry; it's okay." I sure hope it will be okay. The final product would be the tell tale sign, but as the smell of fresh mocha began to fill the air as the coffee/whiskey mixture blended into the chocolate-butter mix in the bowl, at least it was smelling okay. Luckily, I only had one incident of flying batter before everything was blended into a too liquidy batter which then needed to be scraped into the pan and baked at 325 degree.

For a bundt pan, Molly says, "1 hour and 10 minutes." For loaf panS (note the plural), she says, "start checking after 55 minutes." What about one loaf pan? I decided to check at 45 minutes, and I am glad I did because the toothpick came out clean. It was done, and maybe just a bit overdone. I needed to wait and see.

After 15 minutes of cooling, I unmolded the cake and attempted to "sprinkle the warm cake with more whiskey." Molly says to do this by shaking one teaspoon over the cake. She used three teaspoons for the bundt. May be it's a skill but the shaking of my one teaspoon led to more whiskey glops than an even sprinkling on the cake. After three teaspooned attempts on my half recipe, I called it quits. This was not working. WWAD?

As the cake cooled, it began to sank. It wasn't looking so pretty. Even the garnished powdered sugar couldn't hide its flaws. Cutting into it, I saw more denseness than the fluffy bundt-like cake quality I was expecting.

Tasting it, I definitely enjoyed the whiskey with the chocolate. There was a nice subtle chocolate bite which the whiskey helped to enhance. Very nice. Yet, there was a subtle "done" taste undertone that was present - not burnt, but it tasted done. And the texture was also a bit off. Not dense, not fluffy, somewhere in between as the loaf flattened. Not pretty to look at unfortunately -- or may be that's how it's supposed to look. Molly doesn't say. (The texture does look a little like the bundt picture above, doesn't it?)

Hmmm... Did I not fluff something long enough? May be my mom's baking soda was too old so the cake didn't rise? May be my halfing the ingredients in the recipe messed something up? May it's the whiskey? Oh Alice, what would you do?

Though a little disappointed with the final outcome, I must admit my Whiskey Chocolate Cake is still rather yummy and addicting. Sidestepping the "done" taste, I do like the chocolate bite and how the whiskey pairs with but does not overpower it. The texture is odd, but it grows on you. As I am still learning the science in baking, this attempt at a cake becomes a nice tribute to St. Patrick, who is the patron saint of engineers. When it comes to chocolate, however, it is back to "the book" for me - Alice's book, as bittersweet brownies are in line for my next "study break bake." Stay tuned.

Tuesday, March 9, 2010

Bittersweet Deception

There's something about chocolate and liquor that I've really come to enjoy this past year. It's not so such liquor with chocolate, as in a good red wine paired with a rich dark chocolate. It's more liquor within a chocolate dessert that I appreciate. For me, the smooth floral notes of the alcoholic spirits embrace the sharp bittersweet nature of the chocolate, forming a rich dessert harmony for the palate that makes my spirit soar.

After successfully making warm bittersweet mousse, I've been debating what my next study break bake (or "study bake") should be. Liking booze with my chocolate, Alice Medrich's Bittersweet Deception seemed a perfect candidate and I am glad to say, it did not disappoint. I was not only impressed with the overall taste composition of this low fat (yes, low fat) dessert. I was totally blown away by the fact that I could recreate it -- in spite my issues with the liquor. (And no, I was not sipping it along the way. )

According to Alice, the "deception" in this dessert is the fact that it is low in fat (no butter or cream) but rich in taste. It is truly a "dense, moist, melt-in-your mouth bittersweet chocolate dessert." The cognac in the recipe rounds out the richness and makes this nearly flourless cake a truly divine delight.

Being the first time I've really made a chocolate cake from scratch, I proceeded to line up all the ingredients I would need. I didn't have a single 5 oz 70% bittersweet bar as the recipe called for so I used one 3.5 oz with 56% cacao and one 1.4 oz with 70%. I cut out about 1 tablespoon of sugar to compensate, following suggestions Alice gives in her book, Bittersweet. It seemed to work.

I've never finely chopped chocolate before, and learned that my mom's big chinese cleaver works much better than the small paring knife and the medium utility knife I first used. The third knife was the charm.

After combining the 1/2 cup unsweetened cocoa, 2 tablespoons of flour, 1/2 cup of sugar, and pinch of salt in a small sauce pan with 3/4 cups plus 2 tablespoons water, I continuously stirred the cocoa mixture over medium heat to prevent scorching as Alice directed. But I began to wonder how I would know when this very liquidy concoction was simmering, and ready for the final timed 2 minutes before I would need to remove it from the heat. It took a while -- stirring and stirring, but I soon noticed the mixture thickening. I began stirring faster and after 2 minutes, I could tell it was starting to glob. It was done, and I immediately poured it over the chopped chocolate and began to stir. It now came time to whisk in the 1 teaspoon of vanilla (no problem), and then the 2 tablespoons of cognac.

Uh-oh. Problem.

Now my parents aren't into liquor. There is a little cabinet in the dining room where the spirits are kept. The bottles have been there for God only knows how long. While she was still living, my grandmother (dad's mom) would often have a little sip of something before retiring for the evening. She passed away over 15 years ago. The booze is old, I know. But being in an unopened bottle and baked in a cake, the cognac, I figured, wouldn't be a problem. It unfortunately was.

Screwing off the lid, I discovered that the cork was so old it had disintegrated from the top and was stuck in the neck of the bottle! As I see the chocolate out of the corner of my eye starting to cool and I need to whisk the cognac NOW -- what to do? Use another liquor maybe? No. Alice specifically says cognac or rum, and I know there is no rum in the house. Alice also does not list the alcohol as optional, meaning that it probably is essential for the deceptively rich taste in this surprisingly low-fat dessert.

I grab a cork screw to see if it would help. It didn't get the cork out, but it did drill a hole through the cork's center so that I could see into the bottle. As I poured to measure out the necessary one tablespoon, little bits of cork came floating out onto the spoon. I eventually was able to skim off the cork bits, add the cognac to the chocolate mixture, and whisk it in. Breathe a sigh of relief.

The two eggs, egg white, and 1/2 cup sugar did double in volume after beating on high for about 5-6 minutes as Alice noted, creating a foamy liquid froth that was easily mixed 1/3 at a time into the chocolate. I had done this with the mousse and found myself getting the hang for this folding action.

My mom had picked up some baking parchment so I could cut a circle for the bottom of the 8 inch pan. With the sides greased, and the batter poured, it was into a baking pan which I filled with BOILING water. (I learned from my mousse experience.) 350 degrees for 30 minutes, and the cake was crusty on top and the surface sprung back when gently pressed. Well, sort of. I gave my chocolate creation a few more minutes so it would have a better "spring" rather than be a simple "sprungk."

After a cooling and a few hours in the fridge (Alice says overnight but I couldn't wait), I unmolded it, while my mom taught me how to lightly dust it with powdered sugar.

And with the first bite, I was hooked. It was rich and dense, moist and decadent, with a deep bittersweet bite that was underscored by the cognac which seemed to intensify the chocolate and to meld the flavors together so to raise this cake to a new level of royal richness. It's hard to describe, but boy, was it good.

The cognac created a rich flavor profile so that this low-fat chocolate dessert tasted deceptively bad for you. That is the "Bittersweet Deception."

The liquor in this dessert made it soar over the top, as the spirits with the chocolate made my soul sing with another dessert success. I'm getting the hang of this chocolate baking thing, and learning a few things too. Next time, check the booze before I begin.

And may be sample a little too!

Wednesday, March 3, 2010

Chocolate, Chocolate Chip, Walnut Cookies

The best breaks in life are free. With the thesis crunching in, time is a precious commodity. But thanks to my cousin, I was able to break, bake, and enjoy some homemade chocolate cookies, without having to do more than pop open the lid and scoop. It was almost as easy as "open box and bake." And the results - definitely much more delicious, though a bit crunchier than I would have liked!

My cousin Janeen (who won my 2009 "perfect" chocolate cake contest) was telling me about some of her recent baking experiences. There was a new VEGAN recipe she wanted to try from Veganomicon by Moskowitz and Romero. "Chocolate Chocolate Chip Walnut Cookies" sounded yummy, veganly perfect, and not being shy when it comes to chocolate, I of course volunteered to be her guinea pig.

Since Janeen lives about 30 minutes away, sampling a fresh cookie from her is a challenge. But because my parents are in her area on Sundays to visit our grandmother, it worked out that they could be the cookie couriers. Rather than baking the cookies, Janeen decided to send the raw dough and let me bake them fresh and enjoy them hot from the oven because when it comes to home baked cookies, there is really no better way to enjoy them.

With the rain coming down this afternoon, thoughts of warm, fresh-baked cookies filled my mind. A perfect day to bake and to take a break from the thesis. And with Janeen already having done the hard part in assembling the dough, I just needed to form the dough into one inch balls, flatten them on the pan, and bake.

Now my mom isn't really much of a baker and supplies are a bit scarce here. "I have a non-stick pan for you to use," she said. With a high learning curve in baking, I consented, warmed the oven to 350 degrees and began to place the cookie dough on the dark non-stick cookie sheet. Though a bit oily, the dough was a deep dark brown with a wonderful chocolate smell, packed full of walnut and chocolate chips. I was so ready to eat the raw dough but I resisted.

(Come to think of it, I could have eaten them raw as there are no eggs and thus no salmonella fears to contend with. Next time...)

Soon the smell of warm baking cookies filled the air, and at the end of the allotted 10 minute baking period, the cookies came out of the oven looking wonderfully appetizing. My mom and I were both ready to get at them, but we let them cool, and my mom was patient as I took my pictures. In no time, however, the taste test began.

The cookies were still slightly warm and had a wonderful deep chocolate-flavor. "Not very sweet," my mom said. And personally, that's how I like them as the bittersweet undertones lifted the rich subtle sweetness in the chopped walnuts and the chocolate chips. There was however a clear crunch to the cookie, and an "almost burnt" taste that lingered. While my preference is moist and chewy cookies, my mom loves crunchy cookies (along with nuts and chocolate) and so for her, it was a perfect combination. She loved them.

For me, I adored the taste combination and the fact that they are VEGAN. I would, however, have preferred a chewy, fudgy texture. Now if I had listened to Alice, I would have known better.

In her book Bittersweet (my new Bible on chocolate baking), Alice Medrich notes that "cookies will have the best flavor and texture if they are baked on sheets lined with parchment paper, or even wax paper, which insulates them just enough but still allows the cookies to be a little crusty on the outside and soft within." She goes onto to write, "Pans with dark surfaces (even if they are non-stick) tend to scorch rich chocolate cookie bottoms before the centers are cooked." There is my answer. I baked these rich chocolate cookies on my mom's non-stick dark pan and the pans scorched the bottoms.

Alice knows best. And I know better now.

But in any case, the cookies were (and still are) excellent. What makes them better is that the ingredients were blended and sent with love by my cousin, and baked fresh and enjoyed with my mom. And I learned something about baking too.

Overall, it was a wonderful baking break on a rainy day. Now it's back to the books, until the next chocolate adventure when the baking plan will be Alice's Bittersweet Deception. "Cake," she writes, "doesn't really begin to do justice to this dense, moist, melt-in-your-mouth bittersweet chocolate dessert." Definitely, my kind of indulgence. When the thesis editing is done, the baking will begin. Stay tuned

Friday, January 1, 2010

Chocolate Wisdom for the New Year

HAPPY NEW YEAR! As 2010 begins,
I have a chocolate gift for all you chocolate lovers out there:
The Wisdom in Chocolate in a powerpoint slide presentation.*


Click the picture above or click here for the download and enjoy!
The download may take a few minutes but it is worth the wait.

May your cup always be full of love and chocolate this new year. PEACE.

* This is an adaptation of a slide show sent to me by a friend. Thanks Will!